Remove Almost Any Carpet Spot or Stain in Two Steps or Less
DISCLOSURE: Some of our articles may contain affiliate links. If you use these links to make a purchase, we may earn a commission (at no cost to you). Thanks for supporting us!
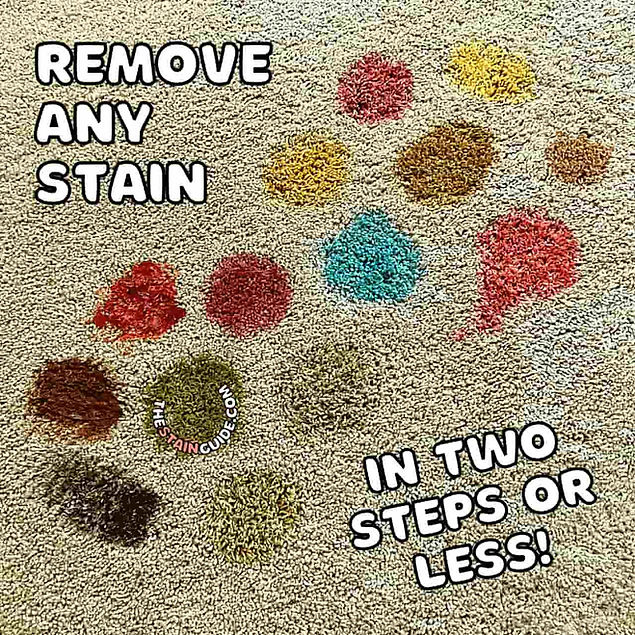
In this guide, you’ll learn how to remove virtually any carpet spot or set-in stain in two steps or less:
Step 1: Spot Removal.
Physically remove the substance causing the spot.
Step 2: Set-In Stain Removal.
How to use an oxidation reaction to break down set-in stains.
In most cases, Step 1 is all you need. Step 2 is for stubborn, set-in stains that may seem impossible to remove.
SKIP TO:
- Why This Works - The Science Explained
Step 1 - Spot Removal - Step-By-Step Instructions
Spot removal means physically removing the material that caused the spot, such as coffee, wine, pet urine, or soda.
The most important part of this process is extraction.
Instead of simply blotting the carpet with a towel, use a portable carpet extractor to flush the area with clean water and pull the contaminated liquid back out of the carpet.
DIY Spotter Recipe:
DIY Spotter is a homemade recipe I developed during my years as a professional carpet cleaner. I've used it for years with excellent results. It's a highly effective, general-purpose carpet spotter that works on a wide variety of common spots and stains.
DIY SPOTTER RECIPE:
-
1 cup water
-
1 tsp liquid dish soap
-
2 cups 70% isopropyl alcohol
YOU WILL NEED:
1) Portable Carpet Extractor (USA, UK, CAN)
2) 2 Spray Bottle (USA, UK, CAN)
3) 70% Isopropyl Alcohol (USA, UK, CAN)
1. Apply the DIY Spotter
Liberally apply the spotter to the stained area.
DIY Spotter Recipe: 1 cup water, 1 tsp liquid dish soap, 2 cups 70% isopropyl alcohol.
2. Extract With Clean Water
Use a portable carpet extractor with the solution tank filled with clean tap water. Flush the area thoroughly and extract the loosened material from the carpet. The clean water also rinses the detergent from the carpet, leaving the fibers clean and free of cleaning-solution residue.
3. Repeat
Reapply the spotter and extract again as necessary. Continue until the spot is completely removed or you stop seeing further improvement.
4. Stop If the Spot Is Gone
If the spot is gone, you're done. If the carpet is clean but discoloration remains, move on to Step 2!
Step 2 - Stain Removal - Step-By-Step Instructions
If you’ve come to this page after trying multiple spot removal methods without success, Step 2 is probably what you need.
Stain removal uses a chemical reaction to break down set-in stains.
This method is color-safe: it is strong enough to break down organic and food dyes, but gentle enough that it won't bleach standard dyed carpet fibers.
The Best Color Safe Stain Remover: Salon-Grade (6%) Hydrogen Peroxide
A professional carpet cleaner’s go-to tool for set-in stains is 6% hydrogen peroxide. Use salon-grade 20 Volume Clear Developer or 6% hydrogen peroxide.
Just as 6% hydrogen peroxide breaks down melanin pigments in hair, it breaks down the tough pigments found in food, beverages, artificial food dyes, and natural spills.
Important: Always perform Step 1 (Spot Removal) before starting Step 2. Removing physical contaminants first ensures the peroxide can focus directly on the remaining set-in dye.
PART 2: STAIN REMOVAL - YOU WILL NEED:
1) 6% Hydrogen Peroxide / 20 Volume Clear Developer (USA, UK, CAN)
2) Household Ammonia Cleaner (USA, UK, CAN)
3) 2 Spray Bottle (USA, UK, CAN)
1. Apply 6% Hydrogen Peroxide
Liberally spray 6% hydrogen peroxide over the remaining stain.
2. Add Ammonia
Add a few sprays of household ammonia, maintaining approximately a 3:1 ratio of hydrogen peroxide to ammonia.
3. Cover and Heat
Cover the damp area with plastic wrap. Place a pot of hot water on top of the plastic wrap to provide gentle, sustained heat. Do not use water hotter than 70°C.
4. Check the Progress
Check the stain every 30 minutes to 1 hour. Replace the hot water as needed to keep the area warm and help speed up the oxidation reaction.
5. Repeat If Necessary
If the stain-removal progress stalls, use clean towels to dry the carpet. Then repeat Steps 1–4 with fresh hydrogen peroxide and ammonia until the discoloration is removed or no further improvement occurs.
6. Rinse and Dry
Use a portable carpet extractor with the solution tank filled with clean tap water. Thoroughly rinse and extract the treated area to remove any remaining cleaning solution.
Allow the carpet to dry completely.
How to Remove Virtually Any Spot or Stain From Carpet - Video Instructions
YouTube Video Comments:
@grahamdick9636
"As a professional carpet cleaner (IICRC certified Master) since 1986, this is the best video I have ever seen on the topic! Well done. I've forwarded to many and will send to many more. Stepping into solvents is another video, as this video covers anything water based. Again, great job. so clear and simple."
@awwbv
10/10 this worked!! Got a rug on FB marketplace tht looked like it had a spaghetti stain on it, who knows how long it was there, but this was the key!! Specifically the set in stain remover !
@drdistewart3943
"This is excellent info. It removed 3 stains that my carpet cleaner and multiple carpet stain removers couldn't! Thanks"
@shonuff4323
"This is amazing!! I had a spot that I tried everything on. I was about to just try and patch the carpet. I did one more search to try find something that worked. So glad I found this. Just absolutely amazing!"
@hichamLaaz
"Thank you so much for this video. I tried all kind of expensive cleaners, and none of them worked till I found your video and used step 2 and magic happened ."
@AbiFong2024:
"This is the best video about carpet stain removal I have watched on YouTube so far ! Thank you so much!"
Check out our YouTube Channel for more great videos! @TheStainGuide
Why This 2-Step Method Works - The Science
There is a simple reason this two-step method works so well: Part 1 physically removes the material causing the spot, while Part 2 chemically changes any color that remains behind.
1. Why DIY Spotter and Extraction Work Together
DIY Spotter is designed to loosen and release the material causing a carpet spot so it can be removed from the carpet fibers.
The formula contains three ingredients, and each one plays a different role:
Water helps dissolve and carry away water-soluble components of the spill.
Dish soap contains surfactants. Surfactants help water spread across the carpet fibers and interact with oily or greasy soils. They surround and suspend loosened soil so it can be carried away rather than simply redistributed through the carpet.
Isopropyl alcohol acts as a solvent. It can help dissolve and loosen certain substances that water and detergent alone may have difficulty removing.
Together, these ingredients give DIY Spotter a broad cleaning action. The goal isn't simply to make the carpet look cleaner — it is to loosen the material responsible for the spot so it can actually be removed.
This is where extraction becomes extremely important.
When you spray a cleaning solution onto a carpet, some of the contaminant becomes loosened and suspended in the cleaning solution. If you simply blot the area, some of that material may remain in the carpet.
Extraction works differently. The extractor flushes the carpet with clean water while vacuuming the water back out. This physically carries the loosened contaminant away from the carpet fibers.
That's why I pair DIY Spotter with extraction. The cleaning solution loosens the contaminant, and extraction removes it from the carpet.
Repeatedly applying the spotter and extracting with clean water allows you to continue removing the contaminant until the spot is gone or you stop seeing further progress.
2. How Pigments Get Stuck in Carpet — and How Hydrogen Peroxide Removes the Color
Sometimes Part 1 works exactly as intended: the original material causing the spot is completely removed, but the carpet is still discolored.
This happens because some stains contain strongly colored molecules called chromophores. These molecules absorb certain wavelengths of visible light, which is what makes us see them as a particular color.
During a spill, these colored molecules can become strongly associated with or attached to the carpet fibers. Once that happens, simply dissolving and extracting the original material may no longer be enough to remove the visible discoloration.
At this point, we need a completely different approach.
Instead of trying to physically remove the colored molecules, hydrogen peroxide uses oxidation to chemically alter them.
Hydrogen peroxide is a powerful oxidizing agent. It reacts with the chemical structures responsible for a pigment's color, altering the chromophores so they no longer absorb visible light in the same way. As the chromophores are broken down or chemically changed, the color fades or disappears.
This is why Part 2 can succeed when extraction has reached its limit. Part 1 removes the material; Part 2 changes the chemistry of the color that remains.
In other words, we are no longer trying to pull the stain out of the carpet. We are using chemistry to make the remaining discoloration lose its color.
This distinction is important because a carpet can be completely clean while still looking stained. If the original contaminant has been removed but colored molecules remain attached to the fibers, more extraction may not solve the problem. Oxidation provides a different way of attacking the discoloration.
Why Hydrogen Peroxide Is Safe for Colored Carpet
You might wonder: if hydrogen peroxide removes color from a stain, won't it also remove the color from the carpet?
Generally, no — and the reason comes down to what the peroxide is reacting with.
Hydrogen peroxide is particularly effective at breaking down many of the organic compounds responsible for stain discoloration. It reacts with the chemical structures that give these pigments their color, causing them to lose their ability to absorb visible light.
Most modern synthetic carpets, such as nylon and polyester, use dyes that are chemically bonded to the carpet fibers and are much more resistant to oxidation. This allows hydrogen peroxide to attack many stain pigments without noticeably affecting the carpet's original color.
That's why hydrogen peroxide can be such an effective tool for removing stubborn discoloration from colored carpet. It can break down the unwanted color while leaving the carpet's original color intact.
As with any chemical treatment, always test an inconspicuous area first to make sure the carpet is colorfast.
Notes
-
No Dilution Needed: Do not dilute the 6% hydrogen peroxide or household ammonia. Use them as-is for optimal results.
-
Handle Delicates with Care: Avoid using these methods on delicate materials such as wool, silk, or other natural fibers. For these items, it's best to consult a professional cleaner.
-
Test in an Inconspicuous Area: Always test any stain removal method in an inconspicuous area on your carpet before full application. This can be done on a scrap piece of carpet or in the corner of a closet.
-
Avoid Direct Sunlight: Stain removal should not be conducted in direct sunlight. Close the blinds to prevent exposure to harsh sunlight when using hydrogen peroxide.
-
Ventilation for Ammonia: Household ammonia can have a strong odor. We recommend opening a window to enhance ventilation and reduce the odor. Rest assured, the ammonia odor dissipates completely as the carpet dries.
-
Safety First: During spot and stain removal, it's best to keep your children and pets in another room to ensure their safety.
-
Protect Your Skin: Always wear plastic gloves to shield your skin when handling hydrogen peroxide.
-
Never Mix with Bleach: Never mix household ammonia cleaner with bleach. This combination produces a toxic gas called chloramine, which can lead to shortness of breath and chest pain.
-
Use at Your Own Risk: These methods are offered for informational purposes, and we recommend using them at your own risk.